Saturday, December 24, 2011

Merry Christmas to You and Yours

Well, I nearly did it again: let the entire holiday season pass without one post. I have just a tiny window of opportunity today, Christmas Eve, to get this done and to send you a little season's greeting. Family is home, the house is ready, St. Wayne has his chili on the stove, and my heart is finally in the right place. No more rushing around trying to "get ready." If it's not done by now, I'm scratching it off the list. I've learned over the years, nobody knows the intentions I have, so they won't be missed if they don't get done. Right? It's a freeing thing to know! I do think I've learned something new this year. I put the tree up and decorated the house early in November so that when we returned home after spending Thanksgiving away, it was all done. I felt that I had extra time to get the shopping and wrapping done and it extended the seasonal feel. I always think I just get it all decorated and then it's time to start taking it down. I never feel that I get enough time between my tree and me. I'm happy with that this year. I've really enjoyed the extra time when the house is quiet and the lights are twinkling in the dark. My favorite time to enjoy the season and the memories of Christmas past...just me and my tree. So pooh on the people who make fun of me for getting a head start, you do it your way and I'll do it my way. Whatever works, right? Here are some pictures of the way I decked the halls this year, starting with the antique sled that holds the tree and a newly acquired tree topper, a crown:
Here are the Santas that greet me with "Judi, we love you this munch," every morning. This year, I've moved them to the entryway because that's the only room where I've included red. And they're fun greeters to everyone that walks in the door!
I had my annual Cookie Swap that's pretty much been a tradition at my house for 40 years and this is the centerpiece and party favors/place cards. And the decorated light fixture above.
I'm so glad I had a few minutes to let you know that I wish you well and I hope you have a Christmas full of love, memories, and sweet blessings. Enjoy!

Thursday, October 20, 2011

Pear Wafers and Cheese

Invite guests in to toast Fall and serve this delicious appetizer. It's unusal and fun and more nutritious than ordinary crackers. And not only does this novel hors o'euvres tastes delicious, it brings a welcoming aroma throughout your whole house. Inviting and delicious. But first, before you dive right into the preparation of these pear wafers, there are two special types of equipment you MUST have. If you don't have a mandoline for slicing pears very thinly, pick one up at the grocery store for under $10. Now, if you're really into thin slices, you can spend megabucks on one of these in a specialty store. The choice is yours, but you have to have THIN slices of pears. And the next thing you need is a pair of Silpat liners for your baking sheets. These are from France, available at a specialty store, and a must-have for this recipe. Parchment won't do. It's Silpat or don't even try this. The pear slices will stick to anything else. Trust me on that one. The liners are expensive but can be used over and over for baking cookies, candies, and all sorts of things and, in my opinion, are definitely worth the investment.
Okay, once you have the right stuff, you're ready to go... Preheat your oven to 225 degrees. In a small sauce pan, heat 1/2 cup of water, 1/4 cup sugar, and 1 Tbls. lemon juice. Stir over medium heat until the sugar is dissolved. Set aside. Slice the unpeeled pears (your choice of good pears, firm, but not too firm) paper thin. Just run it right over the mandoline blade and when you get to the middle of the pear, your slices will contain a slice of the pear stem (those are my favorites!). Dip each slice in sugar water, shake off excess water, and place in a single later, untouching, on the Silpat liner. Place in the oven and bake for 4 hours. Store in a tin to retain the crispness.
Before baking...
After baking... I serve pear wafers with Boursin Cheese Spread. It's a mild, peppery cheese that is easily found in the specialty cheese section of your favorite grocery store. If you can't find it, here's a quick and simple recipe: 8 ounces of cream cheese, softened, 4 ounces farmers cheese, 2 large cloves of garlic, 1/2 cup finely minced chives, 1/2 cup finely minced parsley, lots of freshly ground pepper, salt to taste. Mash garlic and add to chives and parsley. Mix with cheeses in a mixer. Season with a little salt and alot of pepper. Chill. Bring to room temperature for serving.

Wednesday, October 19, 2011

Pumpkin Charlotte


Here's the recipe I promised when I posted last. It's the easiest and tastiest recipe I make for the Fall. I think you'll love it.

Pumpkin Charlotte

2 3-oz. pkgs. (24 total) ladyfingers*, split
2 cups whipping cream
2 Tbsp. powdered sugar
6 oz. cream cheese, softened
1 Tbsp. granulated sugar
2 4-serving-size pkgs. instant vanilla pudding
1/2 tsp. ground cinnamon
1/4 tsp. pumpkin pie spice
1/4 tsp. ground ginger
1 15-oz. can pumpkin puree (not pie filling)
1 cup milk

Chill a mixing bowl and beaters. For the crust, line the bottom of a 9-inch spring form pan with the ladyfingers, cutting to fill all spaces. trim bottoms of the remaining ladyfingers slightly to stand in the pan, then place them, round side out, against the inside of the pan. Set aside.

Cream cheese filling:
In the chilled bowl, beat 1-3/4 cups whipping cream and powdered sugar till soft peaks form; reserve 1/2 cup. Beat the cream cheese and granulated sugar till combined. Fold into the whipping cream mixture.

Pumpking filling:
Stir together pudding mixes, cinnamon, ginger, and pie spice. Add pumpkin and milk; beat till thick. Fold in reserved 1/2 cup whipped cream.

Spread the cream cheese filling evenly onto the bottom of the prepared pan. Carefully spread the pumpkin layer over that. Cover and refrigerate overnight.

To serve, remove sides from the pan, place charlotte on a platter. Beat remaining 1/4 cup whipping cream to soft peaks (add additional powdered sugar to taste) and spoon on top. If desired sprinkle with additional pumpkin pie spice. (I sprinkle with a few chopped pecans or walnuts.)

*ladyfingers are finger-shaped sponge cake found in the produce section or in the freezer section at the grocery store. (Do not use the crisp, cookie like ladyfingers.)

Enjoy!

Saturday, October 8, 2011

Putting Out the Pumpkins


It's time for Fall touches and I usually put those out the first of September. Huffing and puffing and sweating the whole time, just knowing that fall weather will kick in at any minute. Well, looking at pumpkins at least makes me feel a tiny bit cooler in this hot and humid spot in South Texas. There's really not much difference in the temperature between August and September down here, but it's just the idea that August is gone!


I fringed this table cover just a bit more so that's it's smaller. I like this look better. I decided to keep the light colored one where it was and put the black one on the kitchen table. The girls were coming over for dessert and cards, so I had the right incentive to get it all done.


This 3-tiered stand on the kitchen counter is something I bought back in April. It's big and holds lots of stuff. I decided to fill it with gourds and fall-colored fruit. I had to promise St. Wayne an apple pie when the Granny Smith's start to look bad. But for now, I like the bright colors mixed in. There's even a little bottle with three white roses on the top tier, but because I'm not the best photographer, you probably can't tell.


For the kitchen table, I bought an orange, pumpkin-shaped basket and placed white roses in it. Filled an old wooden dough bowl with tiny pumpkin-shaped potpourri for fragrance, added a candle and a few gourds, and called it a day. Whatever is on the kitchen table has to be simple and self-contained so it can be moved...either for a quick card game or those rare dinners at the table.

The dessert you see in the last picture is a Pumpkin Charlotte. It's an easy, no-bake, impressive dessert. Looks like you've worked for days on it...and that's my kind of recipe. I'll share it in my next post. I also have an easy and very unusual hors doeuvres that is fun to make. And not only is it tasty but it makes your whole house smell like Fall...

Until next time...

Friday, September 23, 2011

Monogrammed Table Cover


Just a quick post to show you Wednesday's project done over at Debby's from Debby's Gracious Home. This is simply a big square of burlap that she put an "S" on. She also monogrammed a black piece in a taupe "S".

I brought it home and cut and fringed it. I wanted you to see it before I bring out the pumpkins. Now the big question is do I use this color or the black one? I'll go work on it, decide, and then I'll be back.

And I have big plans for using this for Christmas, too. Can't you just picture mercury glass on top? Jingle bells, jingle bells...

Thursday, September 15, 2011

A Very Productive Day


Yesterday was monogram day! I spent the entire afternoon at Debby's office discovering all the wonderful things her new embroidery machine can do. The above picture is an amazing contraption that produces incredible results!

The next photo is her little "cheat sheet" to remind her of the things not to do. I quickly understood why this is essential. Some items have to be inserted upside down and others right side up. And then you decide if the monogram needs to be upside down or right side up. The operator really has to focus or an expensive mistake could easily be made. Luckily, none were made yesterday and that's especially good since it was all my stuff! But that's why Debby invited me over...to practice. She issued a disclaimer right off the bat, "If I screw this up, I'm not replacing it!" I totally understood it was complimentary monogramming at my own risk!


We started with a set of six Pottery Barn napkins that was a birthday gift from Brian and Myriam. (I didn't tell her that part...didn't want to make her nervous!) I thought numbers would be fun on those as these are my favorite napkins that I use alot. Her first reaction was, "I've never done numbers...I don't know about that!" By the time she'd done all six, she was a pro. They are more trouble than a monogram, though, because you have to set up each one individually, and with a letter you use the same set-up and just insert the next napkin and embroidery the same letter. But, I couldn't be more pleased with my new numbered napkins.

And then we got really adventuresome and monogrammed a small handbag I've had for quite sometime. It was pretty cute to begin with, but adorable now!


The black napkins with the stripe are now casual and cute. I can use these indoors and out. There were ten of those and took quite awhile to finish.


But the biggest thrill of the day was a set of eight pale green napkins with a channel stitch that I've always liked. But with a silver Christmas tree embroidered on them, I adore them. I don't care much for the standard Christmas napkins because the colors are never right for me, so I've never bought any. These now fill the bill. My color with my choice of silver tree...wonderful! The only drawback to these is the time it takes for each one. It's quite an intricate design and takes about 20 minutes each. But Christmas is still far away, right?


Isn't this wonderful? Now I'm really looking forward to Christmas!


Thanks, Debby! It was an incredibly fun day and you've made my table look terrific. I appreciate all the time you took on my projects. You are such a wonderful and generous friend and I wish you much success and much profit with this new "sidekick" of yours!

Tuesday, September 13, 2011

Napkins, Napkins, Napkins


I spent the last few days washing, starching, and ironing every napkin I own. My friend and fellow blogger, Debby over at Debby's Gracious Home offered to "practice" monogramming on her new monogram machine anything I needed monogrammed. Well, she's offered the wrong girl. I could keep her busy til the end of time because I love anything monogrammed.

When I pulled out my napkin basket, I found a mess. After I use cloth napkins, I wash, fold, and put them away in my linen closet. So when it's time to set the table for company coming, I usually pull out my basket, decide I don't want to go to the trouble or I don't have enough time to iron, and decide paper will do nicely. Therefore, I don't use the napkins I love.

When I surveyed the contents of my napkin basket, I found napkins on the bottom I forgot I had...and some I'd never used. So I pulled them all out, washed them in separate loads, and got them cleaned and organized. I'm so proud. This is my collection. This is the way they look now without any embroidery on them.

I have indoor napkins and outdoor napkins that are just itching to be "embellished"! I now have to decide if I want an initial or some little symbol stitched on them. Some of my favorite napkins are the large white ones with a knife and fork embroidered on them. They came from Wisteria's Outlet store in Dallas. My friend Cathie found them while shopping one day and called to say I needed eight of them and I thought I did, too. I adore them because I love anything silverware related. So I'll be headed over to Debby's one day this week to make this collection even more wonderful.

Look for a post about the results real soon!

Wednesday, August 31, 2011


Here's a quick and easy way to create a showstopper dessert. Bake a chocolate cake--and I'm including my favorite recipe from Debby over at Debby's Gracious Home plus instructions for a fabulous ganache to glaze.

The first thing you do is visit your local grocery store and buy some white roses. Cut the stems very short and insert into a tiny bottle or juice glass. I wrapped it with parchment and secured with a rubber band. (This part will be hidden.)


Pour the glaze over the cake. It's going to drip down onto the platter. Don't worry about that...all the more chocolate that's "finger-lickin' good"!


Then place the roses--or flowers of your choice--into the center of the cake.


Then sit back and soak up the "oohs and aahs"!

CHOCOLATE CHOCOLATE CHOCOLATE CAKE

1 package any variety chocolate cake mix
1 package chocolate flavored instant pudding (4 ounces)
1-1/2 cup minature semi-sweet chocolate chips
4 eggs
1 cup sour cream
1/2 cup vegetable oil
1/2 cup water

Beat all ingredients except the chocolate chips until well mixed. Then stir in the chips. Spoon into a prepared bundt pan. Bake at 350 degrees for 50 minutes. Cool 10 minutes and remove from pan. Glaze with ganache or dust with powdered sugar.

CHOCOLATE GANACHE

This easy glaze only requires two ingredients: heavy cream and chocolate chips.
Bring your cream to a boil and remove from the heat. Pour over a bowl of chocolate chips. Let rest for a few minutes and then whisk until smooth. You can add vanilla or any flavoring you like, but mix the cream and chocolate first, then add whatever you'd like to experiment with. Just be careful and add it in tiny increments.

Enjoy!

Tuesday, August 23, 2011

Summertime and The Living is Easy...


Okay, if you've been looking for posts, you haven't found any. I've been busy doing everything but that. It's hot in South Texas and oh so dry. So I've taken every excuse I could find to leave town and pursue fun elsewhere.

We did take a few trips to the beach while my friend Cathie was here for Memorial Day, and while my cousin Sandy was here for 4th of July. Both were fun visits with late night talks and lots of catching up.


During the last week of July, we took a roadtrip to Breckenridge, Colorado to cool off. Highs of 80 and lows of mid-40s. My kinda place to be in July! We rode a train to the top of Pike's Peak, shopped, ate, giggled, and shopped and ate some more. We took my son and daughter-in-law, which is always fun.


A really fun thing that came up unexpectedly was a mini-reunion of my classmates from high school. We've reconnected via Facebook and someone suggested meeting for lunch in historic Waxahachie, which is just down the highway from my hometown Lancaster. I got an email telling me about it and saying they wished I could join them, but with 375 miles between us, they understood. Haha...they don't know me very well. I booked a room at the Hampton Inn and made plans to be there. I just hate missing out on a good time!

It was so much fun...just the girls. Most of us hadn't seen each other but for brief periods at reunions since we graduated 43 years ago...but the funny thing is, we were able to pick up right where we left off. There were fourteen of us. We had a great group in high school. We were good friends, some of us since the first grade. It was WONDERFUL seeing everybody and being together. We'll do it again, soon. Yea Facebook!

I'll try to get back in the groove soon and post more frequently. Just don't try to hold me to it!


Friday, June 24, 2011

Summer Snack Basket


Here's a shot of my favorite summer snack. Fresh cherries, crackers, cashews, and a little string cheese. I'd actually rather have this than breakfast or lunch. So simple and the flavors all meld together to make one seriously tasty one-woman party!

The past two summers we've spent time in the northwest corner of the country. Taking planes, autos, boats, and trains we wound our way around the coast of Washington and Oregon, taking full advantage of the cool, crisp air coming off the Pacific. But the one part that sticks in my mind was the "Fruit Loop" around Mt. Hood. We drove around the mountain on a scenic loop that was peppered with hundreds of fresh fruit stands. I think we stopped at nearly every one of them. And out there, their "fruit stands" consist of not only the freshest produce, but baked goods, honey and even art. Just about anything somebody might be in the market for. But, for us, it made for some really great snacking along the way.

And that's when I fell madly in love with fresh cherries. And we even saw them growing on the trees! If it wasn't for those pesky pits to dispose of, cherries would be my favorite food. I lean toward Rainers, but I'll settle for Bing that I can get at my local grocery store...and be darn happy most of the summer. In fact, that's probably my favorite thing about summer is the fresh fruit available and oh is it so tasty...

To dress this snack up so St. Wayne will think it's a meal, I use my little wire produce baskets I've had a hundred years, line them with natural parchment and start filling. To keep consumption of the crackers and nuts at a minimum, I use regular cupcake liners for the crackers and mini liners for the nuts.

Try it, the presentation will convince you it's fun to eat and when you're finished snacking on that fabulous combination of flavors, you're totally satisfied. Light, fun and just a little party in a basket!

Wednesday, June 15, 2011

Monograms and More...


In February of 2010 my friend Cathie's daughter, Julie, got married. When I designed the wedding invitations, I started with a design of the couple's monogram. From there we printed it onto a tag to embellish the satin ribbon tying the invitation. This is a scan of the finished design.

Now that the happy couple are expecting a daughter in September, Julie's busy nesting. She posted a picture on Facebook several weeks ago of a project she'd finished for their master bedroom. She covered her plain headboard with quilt batting and a drop cloth. They are very inexpensive, have a wonderful nubby texture, and are available for next to nothing in Walmart's paint department. And the bonus is you get a huge piece of fabric to work with. Here's a picture of the headboard with the new covering...


Well, her monogram instantly came to my mind when I saw the headboard. So I suggested she let me cut a long strip of leftover drop cloth I had from an earlier project of my own, hem the sides, and transfer the monogram onto the fabric. She liked that idea so when her mom came to visit a few weeks ago, we got it done. I ended up having to go over it with a black sharpie marker because we wanted it a rich, deep black and the transfer came out with a green tint to it.


The above picture is of her and Dave's finished bedroom and the picture below is a close-up. I think it looks terrific! She just wrapped the monogramed strip around the headboard and pinned it into place. That way, if she ever gets tired of it, she can take it off. Good job, Julie!

Wednesday, June 8, 2011

Sprng Has Left Me Sprung...


You may have noticed I haven't been around. It's been an emotional Spring as our family has suffered the loss of my sister-in-law, Syd to a massive stroke in April. She left behind two incredible children in their twenties and lots of friends and family who will sorely miss her. Her beautiful send-off was planned by her daughter, son, and daughter-in-law and was such a wonderful tribute to her. She would have been so proud to know the church was packed with friends who had wonderful things to say about her. We all have sweet memories of Syd. She's pictured above with a quilt she made me a couple of years ago that I cherish and keep displayed in my living room.


We have also had lots of houseguests...seven waves of company in a six week period. All glorious visits from people we love, but it's kept me busy cooking and cleaning and running to the grocery store. We really like nothing better than our family and friends coming to visit and always look forward to the next wave. That's what happens when you live this close to the beach!

One really outstandingly happy thing to tell you about...I'VE RETIRED! No more wedding invitations to assemble all night long to meet a deadline, no more page after page of addresses to calligraph onto envelopes, no more sales taxes to file and pay, so many "no more"s! I'm excited to do lunch any time I want to and I'm especially excited about naps! Ah, daytime naps are such luxuries...

I hope you have a wonderful Summer and I hope I'll find it fun and refreshing and full of all kinds of inspiration to piddle with to help fill this new found time. Stay tuned, I'll keep you posted!

Saturday, April 2, 2011

If You Can..

If you can start the day without caffeine;
If you can get going without pep pills;
If you can always be cheerful, ignoring aches and pains;
If you can resist complaining and boring people with your troubles;
If you can eat the same food every day and be grateful for it;
If you can understand when your loved ones are too busy to give you any time;
If you can forgive a friend's lack of consideration;
If you can overlook it when those you love take it out on you when,
through no fault of your own, something goes wrong;
If you can take criticism and blame without resentment;
If you can ignore a friend's limited education and never correct him;
If you can resist treating a rich friend better than a poor friend;
If you can face the world without lies and deceit;
If you can conquer tension without medical help;
If you can relax without liquor;
If you can sleep without the aid of drugs;
If you can honestly say that deep in your heart you have no prejudice
against creed or color, religion or politics; then, my friend, you are
almost as good as your dog.


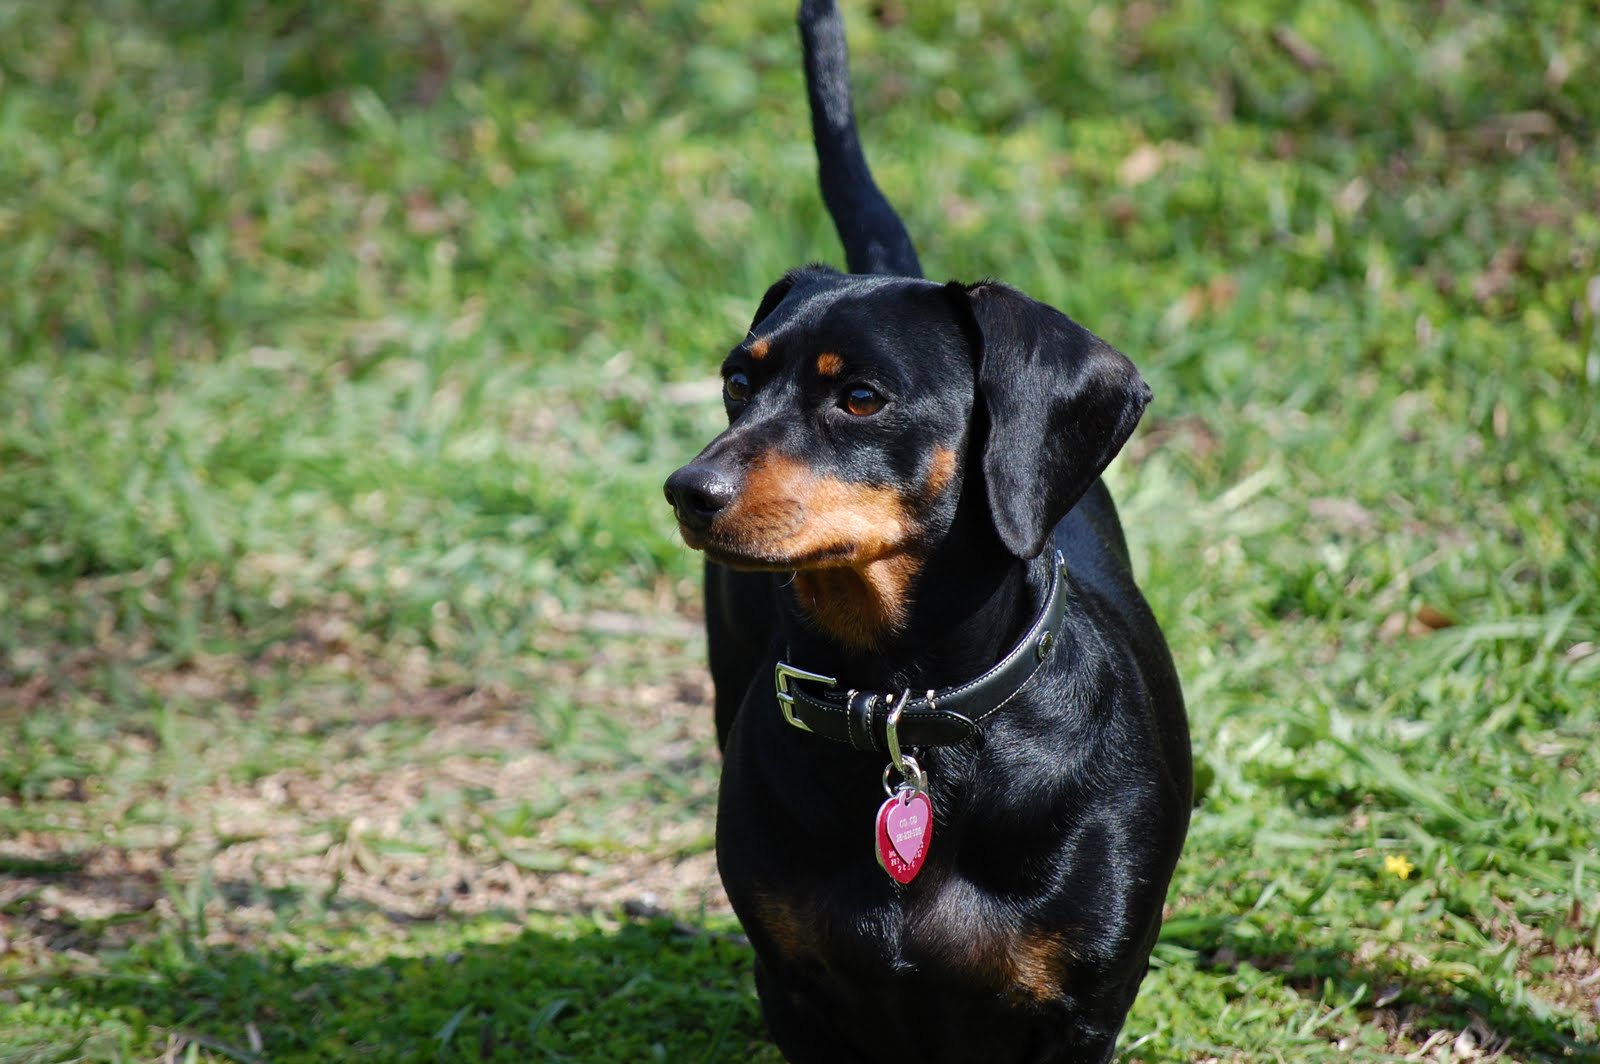
The above quote is sooo true! And it can be said about my little grandogger, CoCo. She has spent the past week with us while her mom and dad were on a cruise. She's had a great time, chasing squirrels, keeping the birds in order, and just generally making sure all is well in the backyard.


She's usually here for a two-day visit, three max, so she didn't pace herself. She came on like gangbusters when she got here last Saturday afternoon. And by Tuesday night, she was exhausted. She's perpetual motion, never stopping from sunup until sundown. She makes me tired just watching from inside the patio doors.


Is that the sweetest little face? I can't say I'm really a "dog person." I don't stop on the street and put strays in my car, but I like dogs...in small doses. But I think dogs are lots of trouble if done properly and I'm not willing to get into it. Alot of my family and friends don't understand that. Especially my sister who is the most devoted animal lover I've ever known. I have to admit, though, I've really enjoyed having this little four-legged squirrel posse here to pet and rub her tummy on those rare occasions she lies still long enough. She is a sweetheart.

And tomorrow she goes home. Back to where life is a bowl of cherries and her mom and dad adore her and fulfill her every wish and whimper. And I'll get back to doing just what I want when I want without any consideration of a poor little pup to put back in the kennel for a few hours so I can go have lunch with the girls, play cards, or go out to eat with St. Wayne. I've actually done very little of that this week just because I hate to call her in from the yard to that lonely little "cage." I think I mind it more than she does. She happily takes a nap while she's inprisoned but when I get back and once that door is opened, she's a black streak through the house and I'd better have the back door standing open when she gets back there or it's crying and carrying on like you wouldn't believe.

CoCo, it's been fun. I've so enjoyed having you here. Come back real soon...you're always welcome. love, Grandma

Thursday, March 24, 2011

Quick and Easy Little Books


Some dear, really dear, friends of ours have offered the use of their ultimately located condo for my family to use for a week this summer. We can't wait. So, I wanted to offer them something for the new condo that they couldn't buy anywhere else. This is a guest book for friends and family to leave comments about how much they enjoyed their stay. They'll always have a record of the fun times that have taken place there.

It's something that's quick and easy and fun to do. I set up lines on my computer and printed 50 or so pages. Lined pages (instead of blank, unlined pages) are much easier and less intimidating to use for most people. I only printed on one side, so if they wanted to draw something or add a photo that didn't fit on the lines, they could always use the back. Then I took the pages to my local printer to have them trimmed and two holes drilled.

Then I found some heavy-weight stock to use as the cover, punched a few holes, tied a cabinet door handle on with ribbon and, viola! it's a fun, oddly bound book. You can decorate the cover anyway you like. I have to admit, this is my first elk. I found the image to trace by typing in "elk silhouette" on Google images. A piece of cake.


This is another one I made several years ago for our family history as written by my Aunt Faye. This cover was made from corrugated cardboard. So simple and fun to do. Now go make a couple of these...it doesn't have to be a guest book, they could include family recipes, favorite photos of a special occasion, or anything else your heart desires. Go on, quit wasting time surfin' the internet and do some productive piddlin'...take a picture and send me a sample of what you've created!

Friday, March 11, 2011

More Inspiration


Here is a book by Sarah Lugg, The Handcrafted Wedding. You don't have to be planning a wedding to find inspiration here. She is the mother of all hang tags and I've admired her work for years. In fact I have had a print of her tags hanging in my bathroom for over eight years. I've removed the print from the frame and scanned it so you can see her tag art.


Being in the wedding business, I buy lots of books pertaining to weddings. Mainly to steal, um, I mean cultivate ideas that I can offer my brides. This one is a beauty. Lots of interesting ideas if you're looking for something different.

It was published in 2003 and it looks like they've changed the cover, but it is available on Amazon. Check it out...it's sweet.

Tuesday, March 8, 2011

Tag Art

Last Thursday, Debby from The Gracious Home, came over to my studio and we spent a little while piddlin' with mailing tags. She takes lots of time and has just that special little something she wants to put on hers and it turns out exquisive. Go to the sidebar and click on her link to see a photo of hers in a post she did today. Me? I'm quick and dirty. I actually didn't complete anything while she was here because I was letting everything simmer. At least that's my story. I think I might have been just a tad bit intimidated by her deliberate creation. I'm more of a "quick and dirty" kind of girl.

So a few days later, with the millions of pieces of emphemera still out on the worktable, I sat down again. This is what I finished with. A dozen of the cutest things I ever saw. First thing I did was download and printed some old photos I had. There's one of my parents kissing at the flagpole, several girlfriends as children, even some old and odd photos I had on my computer from other projects. Then I glued the photo to the tag and added "stuff." And this is what I came up with...ta da...


You can click on the picture to enlarge and see the detail. I think my favorite one is on the center row with the sealing wax.

Haven't decided yet how I'll use them...maybe gifts or even framed in a shadowbox. Who knows...but it sure was a fun way to kill a couple of hours. Just a warning: This is a dangerous piddlin' project...once you get started, you don't want to stop.

Saturday, March 5, 2011

This Rainy Saturday Morning


My dear friend, Debby, over at Debby's Gracious Home sent me this sign. If you haven't been to her blog, you can find the link on my sidebar because I'm not cool enough to figure out how to link you right here. Anyway, I can't imagine why she thought of me when she saw this sign...

Okay, it's a well-known fact that I work in my jammies when I get the chance. And for some reason, I can really move and get things accomplished when I do. However, I've been fully clothed since early hours on this rainy morning. St. Wayne made us omelets, we're listening to Willie Nelson and John Prine on the stereo, and we have no where to be and no one to see. This would be the perfect jammie day, but on the other hand, I really try not to do it when he's home and especially on Saturday, because the day is so full of possibilities I want to be ready to run should one of us think of a movie to see or a great place for lunch.

So...whatever the day holds for you, here's hoping it contains a litle joy. And if that joy comes while in your p.j.'s...that's just fine and dandy. Enjoy!

Wednesday, March 2, 2011

Lettuce Make Place Cards!


Here's a quick, easy, and inexpensive idea for place cards for that dinner party you have planned in the back of your mind.

First step, when you're buying groceries, toss a head of romaine lettuce in your cart. When you get home, chop off the bottom of the stalk about three inches up. Romaine works the best because its leaves are tight and the stalk is small.

Next dab it, cut side down, on a paper towel to remove as much moisture as you can. Ink it on a rubber stamp pad and stamp away, as you would any rubber stamp. The result is a sweet little image of a rose. This is a sample of gold roses I stamped on card stock.


Following the directions drawn on the sample, cut out a square and then with an exacto blade, cut around the top of the rose.

Score down the horizontal middle, on the left and the right of the stamped rose, leaving the rose unscored. Write the names of your dinner guest in the lower right corner, fold on the score and the rose pops up.

Take the time to make place cards for your next dinner. They make a guest feel welcome and who doesn't love seeing their name flourished? Give it a try...your guests will be impressed!